This does not require a working OpenSuSE system to do this.
I have used VirtualBox version that support usb devices. you can download it in their website If you are not familiar with VirtualBox i suggest reading the manual.
You will need a x86 hardware in order for VirtualBox to run.
This was tested with the following host :
I have used VirtualBox version that support usb devices. you can download it in their website If you are not familiar with VirtualBox i suggest reading the manual.
You will need a x86 hardware in order for VirtualBox to run.
This was tested with the following host :
- OpenSuSE (linux)
- Xp, Vista and Win7 (Windows)
I have made an 11.2 x64 SuSE usb-install. The DVD is the prefered installation media, live cd can be used as well or if you can get your hands on a text based installer for OpenSuSE that would suffice.
This guide is good for large size external hdd that is connected via usb. If you just want a pendrive install of SuSE then this HOWTO might fit your needs.
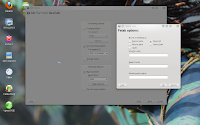
In vbox settings dont attach a networking card and hdd


Instead attach your usb-hdd and the OpenSuSE DVD or .iso

Fortunately the installer will recognize your usb device and will treat it as a normal hdd and normally (cross your fingers) install through it. just install as you would in a physical machine and don't touch the default disk mount option by the installer. The default would be by-id, you do not really have to bother about it. This just shows you how it is mounted in fstab.
- .

When your reach the stage in which you will choose the desktop environment to install you either select directly which desktop to install or choose "other" Minimal Server selection (text mode).

Let the installation finish and let it reboot. Of course it will not boot after the first initial installation since vbox does not support usb booting at the moment . It will give you an error about not being able to boot.

Now shutdown your vm close vbox and restart your host while your usb device is still connected to its port. The idea is to trick the installer that it is still inside vbox while the sweet truth is, you are booting it on a physical machine using your external usb device as its hard disk and continue the installation. Make sure that your computer is able to boot with a usb device. Do not be surprised if it drops you in runlevel 3, without X. You did after all install the textmode version. If you are not comfortable with console stuff don't be afraid about it and i suggest you go with the auto configuration install. You can navigate through it using the [tab] and arrow keys, The [space] key selects and the [enter] or [return] key confirms your selection. Depending on what set up you have, you can update during the installation. if you choose the auto configuration then you might need to update manually after the installation is finished, just log in and "yast" is your friend since it runs on console as well.
Update manually and reboot so the new kernel kicks in.
zypper ref && zypper --non-interactive up
After that restart your system:
reboot
for Gnome:zypper in -t pattern gnome
for LXDE: zypper in -t pattern lxde


place your cursor to the expert mode using the [tab] key and select it using the [space bar] key. (expert mode --> the upper button where it says 3: Full multiuser with network ) It is a

- If you are planning to buy a laptop or netbook then this is probably the good way of testing such device before you buy it. The live cd can do that as well, but some netbook doesn't have a cd/dvd drive and some drivers that are needed to test some hardware in not included like no 3rd party application such as 3d proprietary drivers and such. Unless you built your own usb/iso image using susestudio or kiwi.
- If you cannot afford a dual-boot in your system then this (In my opinion) the best option you have.
This usb install might be useful as a rescue media. Install some useful apps such as "dd_rescue" "photorec" and others.
You can test some DE release since you are using computer's hardware except for the hardisk.
This can also be an installation media. You need to install the package "yast2-live-installer"
Now you got yourself a persistent and portable OpenSuSE system!
No comments:
Post a Comment